
By Joyce Sampson
The decision to bring a bare wall to life can be intimidating. Whether your abode is a massive estate or a studio apartment, curating a gallery wall could be the solution.
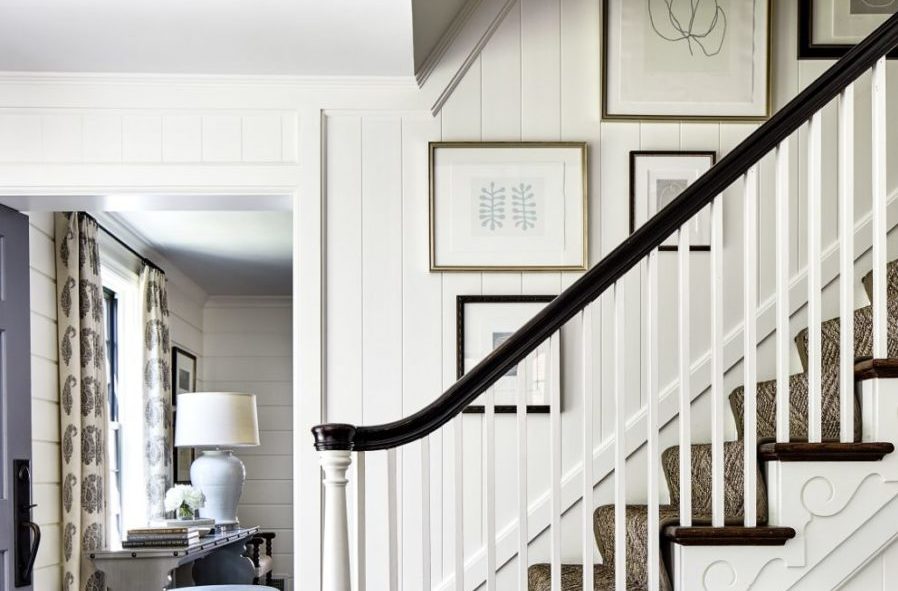
A gallery wall, also called a salon wall, is a collection of art and artifacts that add drama, style and personality to your home. It allows you to showcase beloved mementos alongside original paintings and prints in a mix of styles and mediums.
Its roots are in the 17th-century French salons where the first exhibition was held in Paris at the Palace of the Louvre. Graduates of the Academie Royale de Peinture et de Sculpture displayed their work from floor to ceiling in a variety of styles. This layout is the basis for the modern gallery wall.
The style became popular in the United States in the 20th century, with the wealthy displaying fine art collections in their parlors and living rooms. By the 1960s, the media was touting its virtues to the rest of us. These days, collecting art is easily accessible through sites like Etsy and Saatchi Art.
Interested in trying it out? A few tips from Montgomery County experts prove that planning is essential. Here is what to consider:
Where do I start?
The first question to consider is versatility, says Henry Cross, owner of Cross Museum Services in Takoma Park. The company’s storied clientele includes the National Gallery of Art and the Freer and Sackler Galleries in Washington, D.C. — but even if your homestead isn’t quite the breadth of a museum, a basic principle applies: Do you want a permanent installation or the freedom to make changes as your art collection grows or your artistic leanings shift?
“You’ve got to start discussing what kind of hanging system you want to use so you don’t have to repaint the wall every time you put up another batch of paintings,” says Cross.
He recommends using a track system. “Imagine a metal strip running from the top corner where the ceiling meets the wall — like very thin aircraft cable,” he says, making it easy to hang and rearrange your favorite pieces.
Pro tip:
If your dream house is currently under construction and a gallery wall is in its future, ask the builder to add a three-quarter-inch sheet of plywood behind the drywall for added stability to handle those heavy pieces.
The Art of Curating
“The perfect wall tells the story of a certain experience, like pieces collected during a lifetime of travels. These details help make a home a home,” says Ashley Schubert of Kristin Peake Interiors of Rockville.
Don’t rush it. Start by choosing art pieces and personal items collected throughout the years. Play with shapes, texture and scale. And keep in mind that you’re not limited to framed photographs. A favorite pennant or a tapestry may add visual interest. And remember that simplicity is best, Schubert says.
“My best recommendation is to collect things over time — photos, frames and artifacts that somehow speak to you,” says Christie Leu of Christie Leu’s Interiors in Chevy Chase. “There should be some personality of the family.”
Leu tends to choose a color theme first. Inspiration arises where you least expect it. “I found this really cool piece of artwork that was shaped like a fish. It was black and white and I thought, ‘this was my jumping-off point.’ It wasn’t necessarily the most important thing, but it was the thing that inspired the color theme.”
Pro tip:
How many pictures should you have on a single wall? “You can do as few as four and really as many as the wall can hold,” Leu says. But balance is important in selecting both artwork and frames. “A combination of traditional, vintage, simple and modern frames is more than acceptable,” but save ornate frames as accent pieces.
Laying it all out
Start with the most important, and likely the biggest piece of art, and then just start building around it — just keep adding art and artifacts, experts say. Aim for 3 to 6 inches between each piece — but larger art requires a bit more space between frames.
A popular DIY tactic is to trace the shapes of your art on paper, cut them out and tape them to the wall for a preview of how your layout will look. You can also do the same thing by laying it out on the floor. That way, you can mix and match the positioning of the art until you find the layout that’s right for you.
A slew of inexpensive online wall designer apps are available to make your layout a breeze. One such tool is Wallapp, a webpage that allows you to upload your room and drag-and-drop images on your wall.
Pro tip:
Nix that hammer and nails. Heavy-duty mounting tape does the trick in certain situations. Leu relies on Command Strips to hang smaller pictures because they don’t damage the wall and are easy to remove.


